FCIT is very pleased to announce our move to a new Help Desk Ticketing system called Incident IQ. While not much has changed with submitting tickets, there are some improvements over the old system beyond the sleek, modern look. The clean layout of the dashboard makes it easy to manage requests, add comments or screenshots, and attach files. Emails about your requests are easier to read and always contain the current status along with other information.
With this new system, FCIT can streamline your requests for faster resolution, manage devices and track repairs, and keep better tabs on what’s coming due so we don’t miss deadlines. With a robust knowledge base and customizable request forms, we hope to offer a better support experience and additional self-help options moving forward, and welcome your feedback and suggestions. Below you’ll find a helpful guide on submitting tickets along with handy tips to speed up the process. Let’s get to the good stuff.
How to Submit a Help Desk Ticket
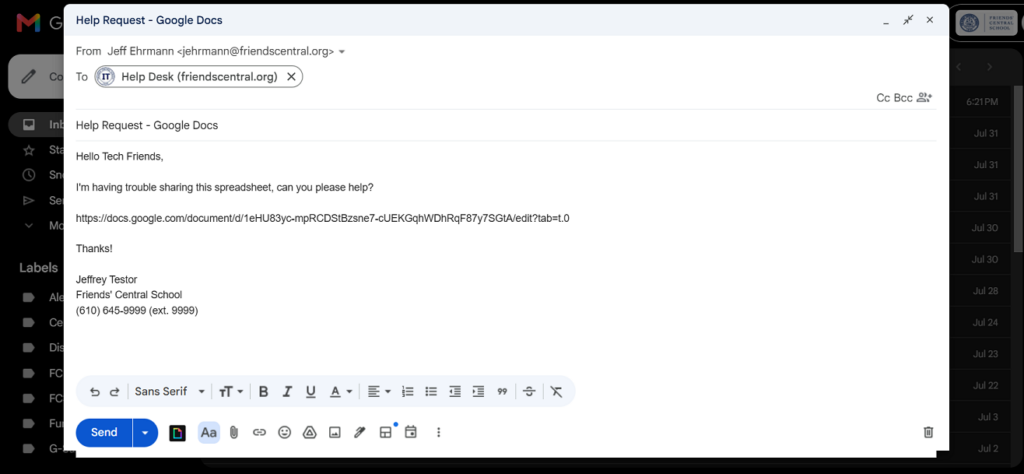
Method 1: Email the Help Desk (helpdesk@friendscentral.org): simple and effective, this creates a ticket automatically and is great for:Questions: How do I share a spreadsheet?Access requests: My class needs to access this website, can you please unblock?Forwarding emails: I received this email about software updates, is this something IT can help with?
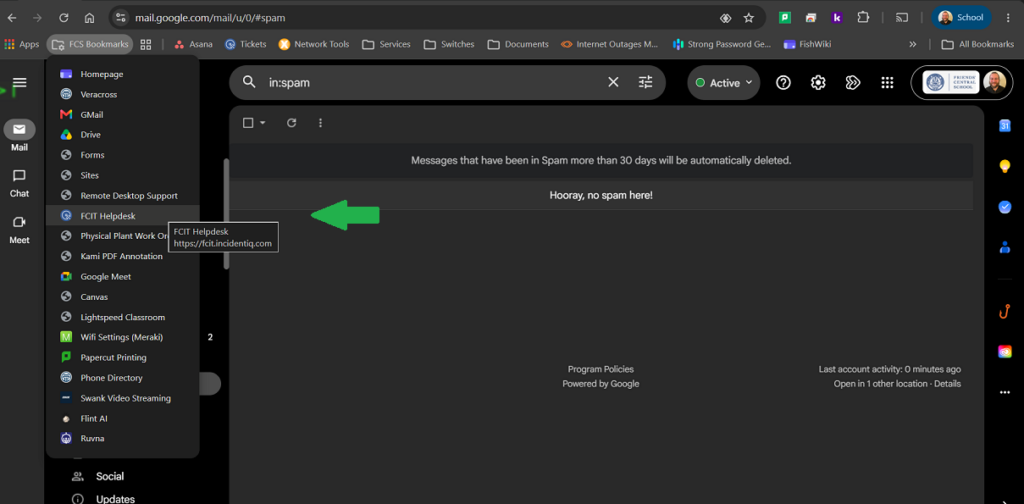
Method 2: Using Chrome: Under FCS Bookmarks, click the FCIT Helpdesk link to submit a form from Incident IQ:
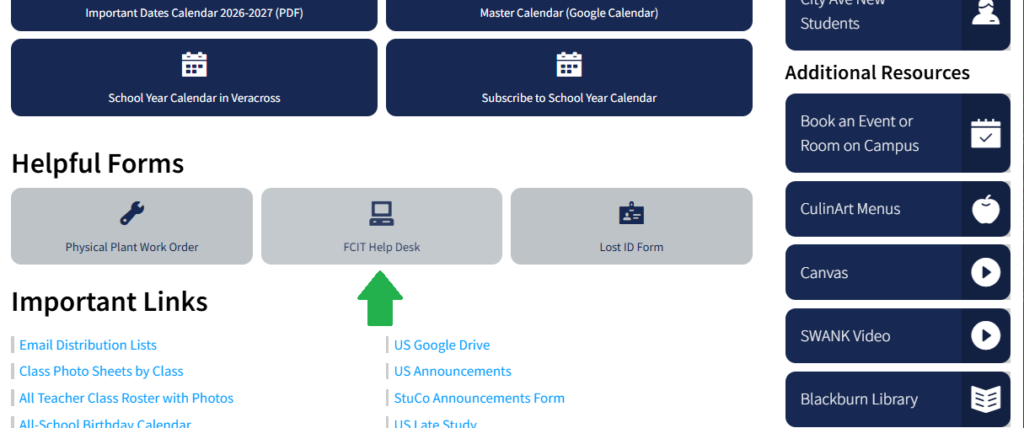
Method 3: Using Veracross: click the FCIT Help Desk button to submit a form from Incident IQ:
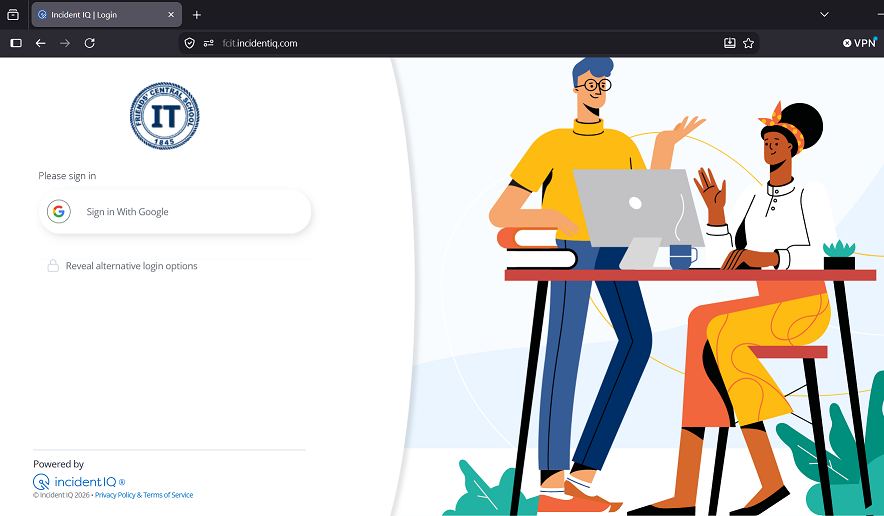
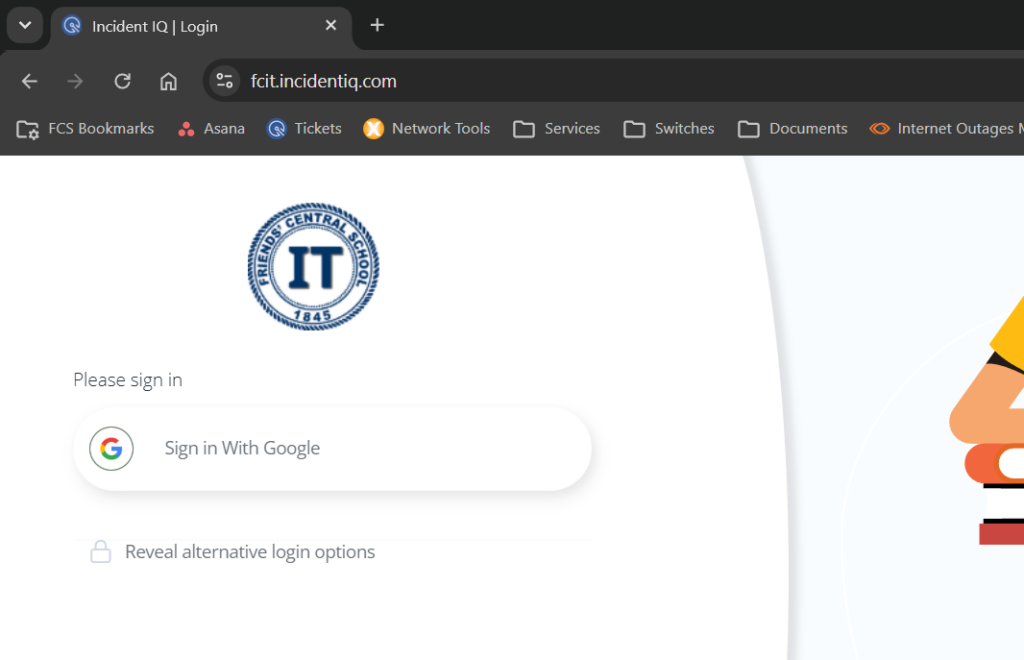
Incident IQ Login Page: clicking the links from Chrome or Veracross takes you here, but you may find it helpful to bookmark the website. You’ll login using your Google account, and submit a ticket using the dashboard form. Skip Gmail and use the dashboard if you have:A detailed request: an event or meeting that requires tech setup and coordination
A recurring problem: previous tickets, discussions, screenshots, or technical information
Multiple files to submit: documents for review, invoices, software licensing, etc.
Using Incident IQ
To login to Incident IQ you’ll use your Google account. Click the Sign in With Google button and allow Incident IQ to access your account. Login here.
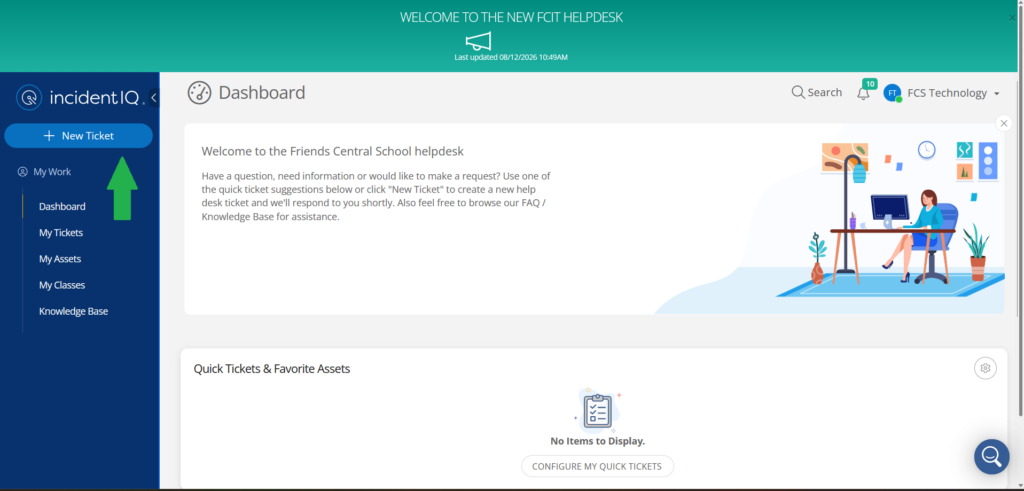
Once you’re logged in you’ll see your Dashboard where you can manage your requests, submit new tickets, print a record, and update information. To start a new ticket, click the blue New Ticket button.
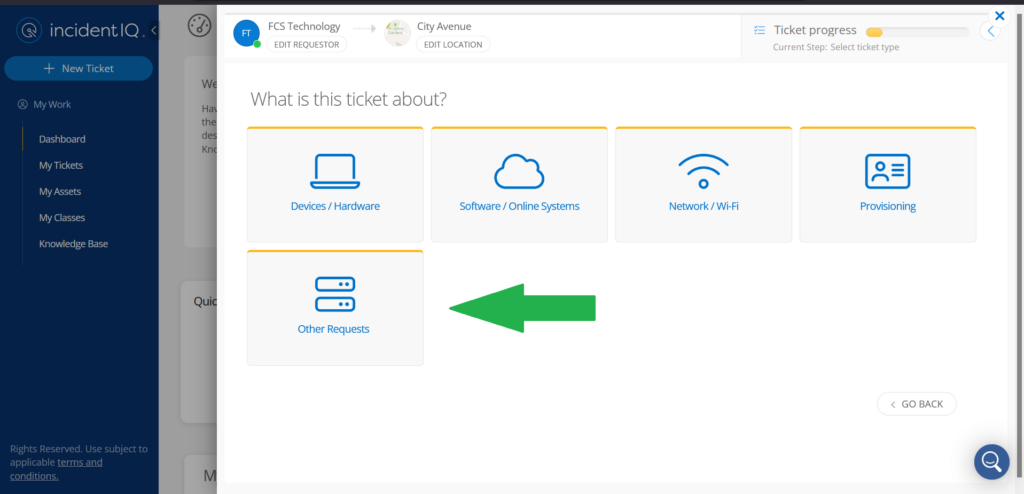
Tell us what your ticket is about by choosing a category. If you’re not sure, choose Other Requests.
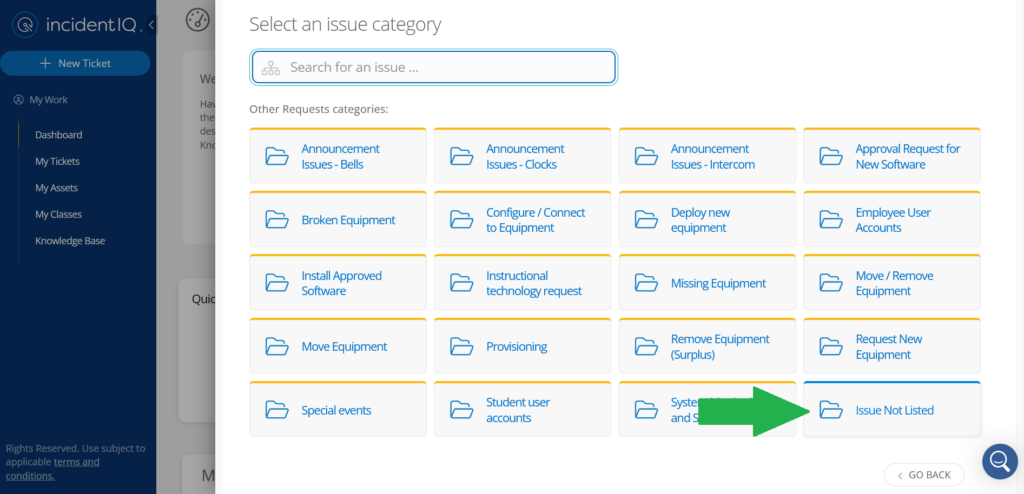
On the next window, you can choose a specific issue from the list. If you’re not sure, choose Issue Not Listed.
The screen above may look different depending on the category chosen in the first step. For example, choosing Network/Wifi in the first step gives you a screen like this one.
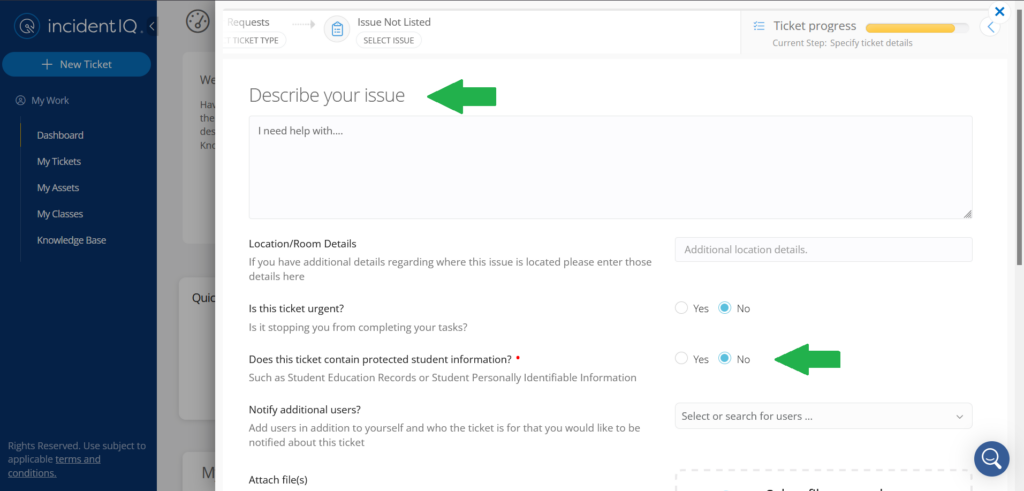
Describe your Issue, and then select Yes or No for Does this ticket contain protected student information? if required. You can add additional details about the location, urgency, or even notify other people. Add attachments using the cloud icon at the bottom.
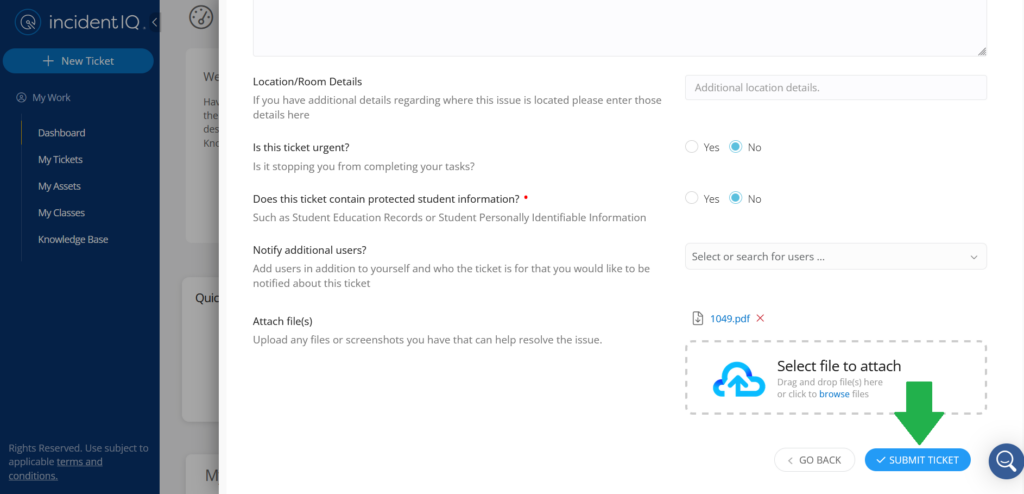
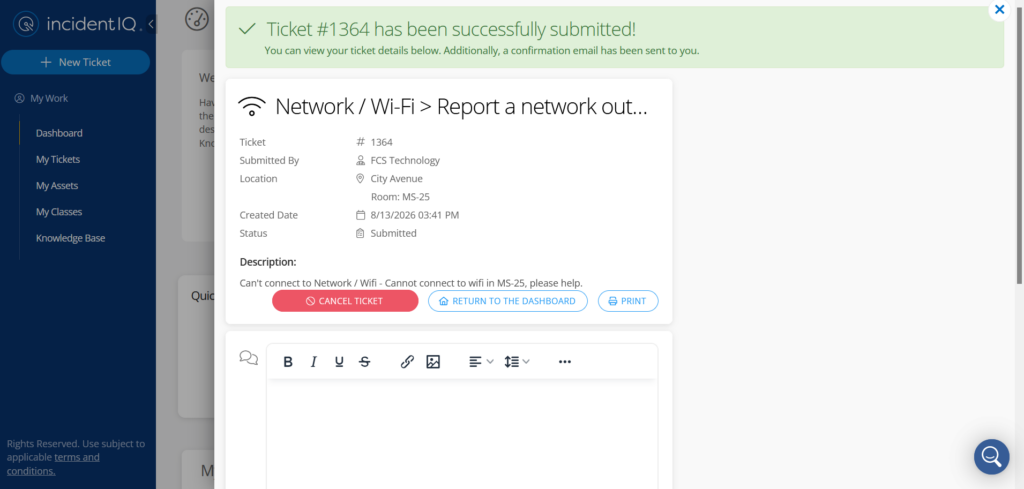
Click SUBMIT TICKET, and you’re done! You’ll see a green banner with a success message and a summary of your ticket.
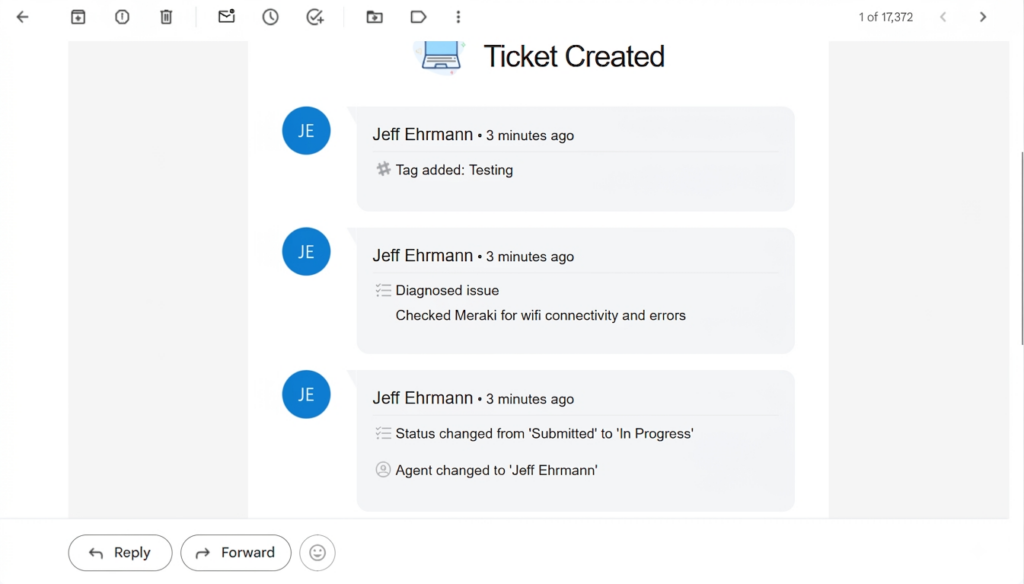
You’ll receive an email with your status and information shortly thereafter.
We’ll get to work on your request as soon as we can.

Helpful Tips:
Follow these steps to submit the ticket form as quickly as possible:
1. New Ticket
2. Other Requests, then Issue Not Listed
3. Describe the problem
4. No for the Student Information
5. SUBMIT TICKET
The fastest and easiest way to submit a ticket is by Email, but we may need to ask a few questions to get to the bottom of the problem.
Are you a DIY type of person? Click the Knowledge Base link from the left menu and browse for the solution.
Do you often make requests about the same type of issue or event? Check out Quick Tickets.
Please leave a comment, question, or suggestion below. Thank you!